Today I want to talk about how I organize my sewing patterns. Until recently, I kept all my sewing patterns in a big pile. I had put them in a folder I was planning on using to collect the girls’ spring artwork. It was all just kind of shoved in there and messy, which made it hard to find anything.

As I was looking for a pattern the other day I realized I needed a new system. I did a lot of thinking and what made the most sense to me was to file them away in the same way I used to file away my learning centers when I was teaching. So off to Target I went and I bought 2 packs of 10 x 13 envelopes.
Now, I never really liked to work with patterns. I used to find them difficult to follow, but as I sew more and more, I find myself using them more. I think I am getting better at reading and using them. Don’t get me wrong, I still prefer designing my own, but there are a lot of really great patterns out there and using them can save me time.
If you read my blog regularly, you’ll know that I don’t ever cut up my patterns. I trace them onto freezer paper so I can use them over and over again. Here’s a tutorial for how I do that.
Here is a list of the materials I needed to organize my patterns:

I bought the little star stickers at Target and I LOVE the push button Sharpie markers. These are fine point ones, which are my favorite kind. I grabbed an index card and made a short list of how I’d like to separate my patterns. After I took this picture, I realized I needed a section for bottoms (shorts & skirts) so I added a “/bottoms” next to pants.
This is a sample of what one of my typical patterns like look:
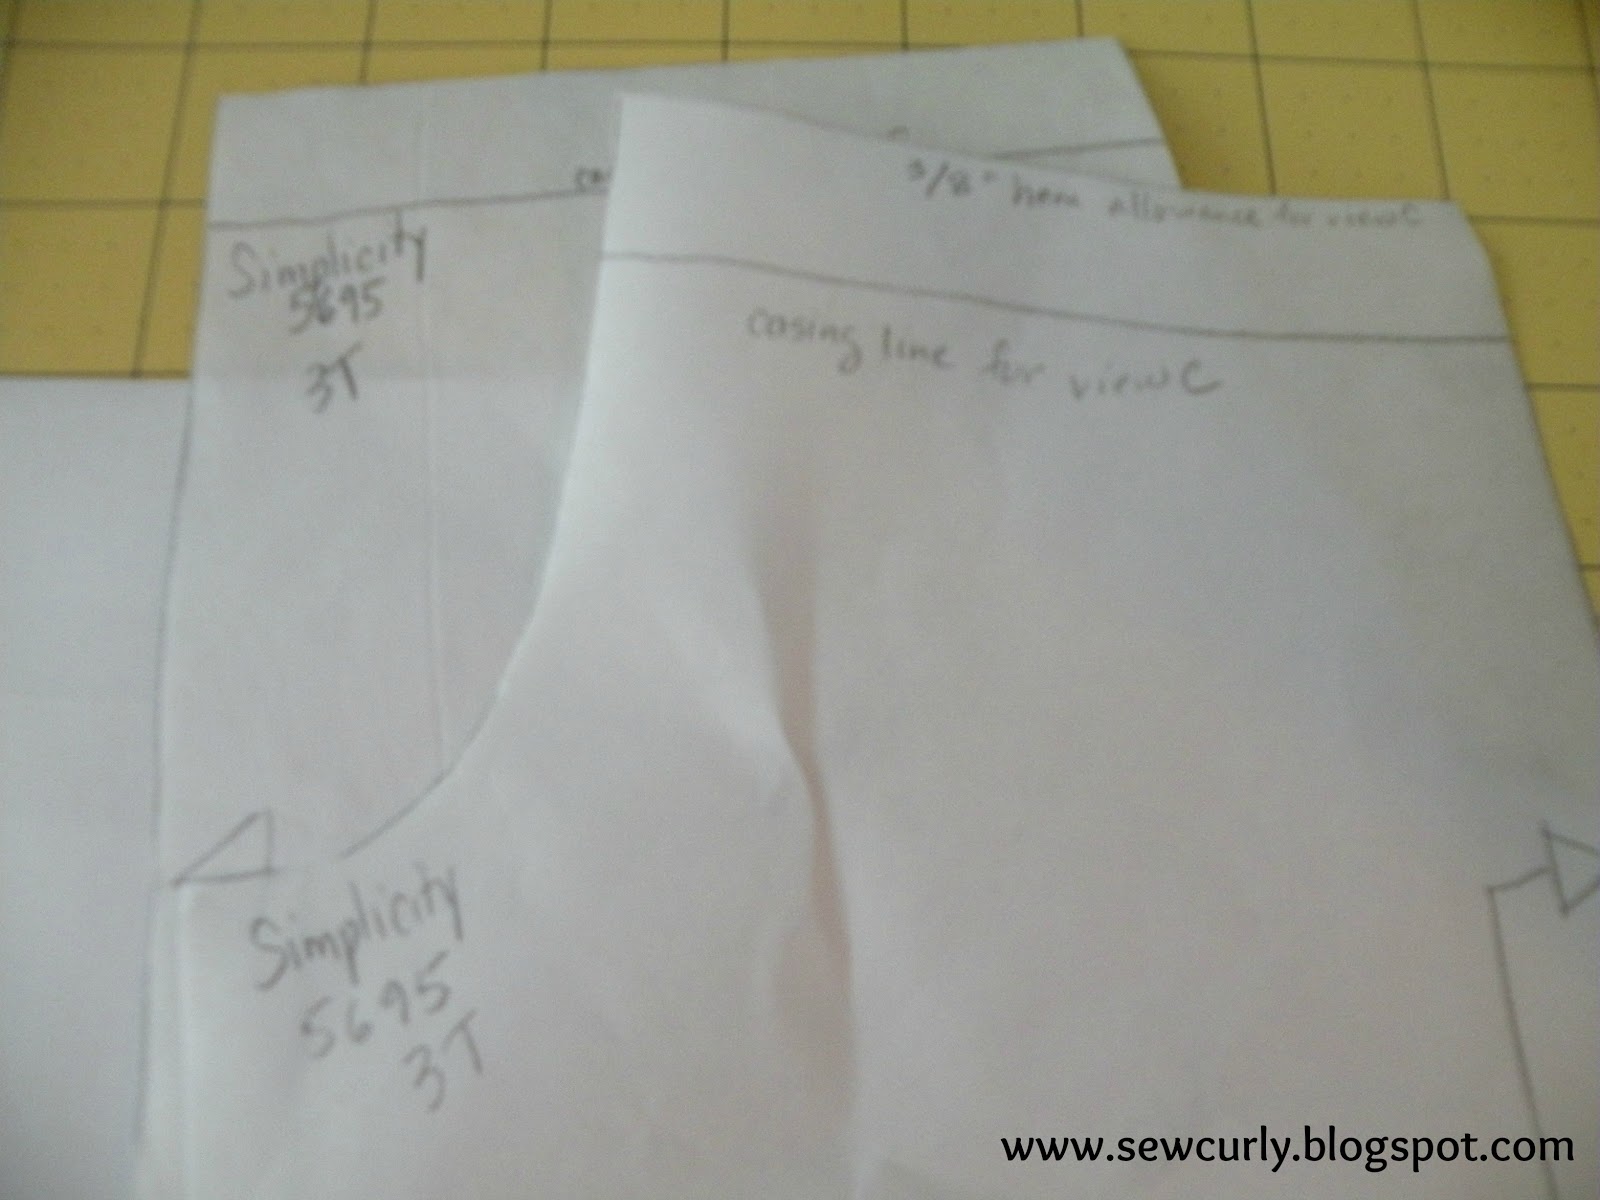
On the top, left hand side of the pattern, I write the brand name of the pattern, the pattern number, and the size of the pattern I have traced. This way I can always guarantee I have the right pieces for the item I am working on. I sometimes write the name of the pattern, too, if there is one.
I fold the larger pieces up so they are able to fit into the large envelope and stack them onto each other.

On the outside of the envelope I write basically the same thing as I write on the pattern: The brand name of the pattern company, the pattern number, a brief description of the pattern, which view of the item I am making, and the size (which I hadn’t listed here yet).

Because I want to keep the original pattern in the original packaging, I make a copy of the front of the pattern and tape it onto the envelope. I use packing tape and tape every edge of the paper. This way it doesn’t get caught on something and rip off.

So far, I keep all my patterns in a large basket. They are kept in order according to the color star (which is the category). Since I use most of my patterns in 3 different sizes (for each of my 3 girls), I have a lot of them. I am thinking I may need to move to a filing cabinet soon.
This is the most convenient way I’ve found to organize my patterns. I am able to keep the original patterns in tact, and still keep a copy of each of my patterns.
Would this system help you?
xoxo
–k
Day 10


brilliant!
Thanks! I just needed them all put away!