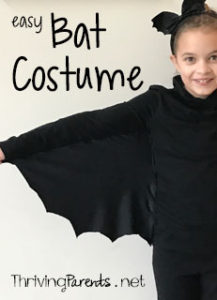
“Mommy, this headband is so cute! Maybe I could be a bat for Halloween,” she shouted across the Target dollar spot section. Everyone in the area turned to look at my adorable 6-year old waving a black headband with bat wings in the air.
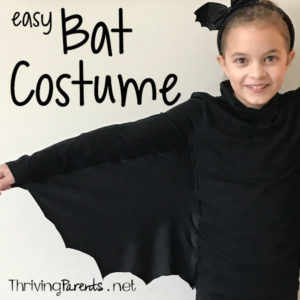
This was the moment that inspired this easy bat costume. It’s an easy costume for a child, or an adult, and can be made in less than an hour.
To make this costume you’ll need only a few supplies:
This post contains affiliate links.
- a black long sleeve shirt
- black pants
- black knit fabric* – the amount of fabric will depend on the size of your child. You can measure the length of their arm or you can eyeball it. I bought 1.25 yards for all 3 girls and for most kids you would be safe with .75 yard
- Sharp scissors
* Here’s the thing about fabric. It comes to the fabric store on a cardboard roll. It’s folded in half width-wise before it’s wrapped around the cardboard. When you buy the length of your child’s shirt, this amount of fabric will be perfect for getting 2 bat wings.
Start by taking the shirt and lay it down and spreading out the body of the shirt and one sleeve. Then take the fabric and fold it in half. The width of most rolls of fabric is about 58″. Take the fabric and gently lay it down on top of the shirt. You want to overlap the top edge (that is not doubled) over the edge of the sleeve by about 1″.
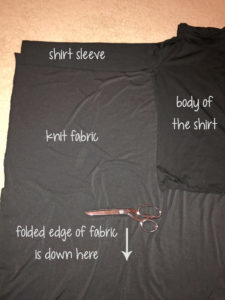
Cut the knit fabric about 2″ below the hem of the shirt and about 1″ beyond the side seam of the shirt. Once you make this cut, you’ll have 2 pieces of fabric. I took these pieces and fabric and folded them in half vertically. This way I remembered which was the length and which way was the width.
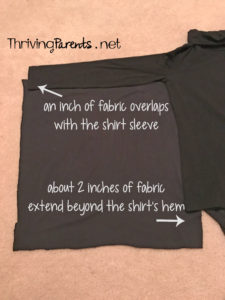
With the shirt spread out on a table, line up the top of the fabric with the bottom of the sleeve. You can either pin the 2 pieces together, or you can just hold them together as you sew. Start sewing at either the shirt’s armpit or the sleeve. Sew a straight line using a 1/4″ seam, making sure you backstitch at both ends.
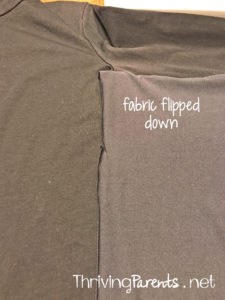
Then flip the fabric down so the stitch you just sewed in your seam is covered. Line up the side of the fabric with the side seam of the body of the shirt. You want it to overlap by about an inch. Again, you can start at the armpit or at the bottom hem of the shirt, making sure you backstitch at both ends.
Repeat for the other side.
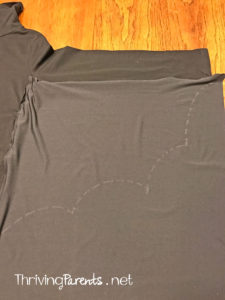
Now that your wings are sewn on, spread the fabric out. Using a piece of chalk, draw out the edges of the bat wings and cut. Because the fabric is a knit fabric, it won’t fray after it’s cut.
You can find cute bat headbands at Amazon or Target.
That’s it! I know it might sound like a lot, but it’s seriously just 4 long stitches with the sewing machine or by hand. If you run into questions, please don’t hesitate to message, tweet, or email me.
xoxo
–k
Click to see our cute Halloween Ghosts in the Graveyard
Read about how we made this adorable Tulle Pumpkin Wreath

This tulle pumpkin wreath was a fun craft for our kids. It helped to develop their small motor skills and allowed them to use their creativity.
Pin this to save for later!
